Seit einigen Tagen ist nun schon der neue Frühjahr-/Sommerkatalog gültig. Für uns ein Anlass, euch ganz viele fabelhafte Projekte mit Produkten aus dem neuen Katalog zu zeigen. Am Ende des Beitrags findet ihr eine Liste mit allen die beim Blog Hop mitmachen. Schaut einfach mal bei den Ladies vorbei.
The new spring summer catalogue is finally live and to show you all the wonderful new products, we have a blog hop for you. At the end of this post you’ll find a list with the links to all the blogs that are taking part in this showcase. I’d like you to visit my fellow Pootlers and see their amazing creations.
Beim ersten durchblättern des Kataloges (im November!) hat mir eine Reihe besonders gefallen. Die Reihe Blütenfantasie (findet ihr auf Seite 22/23). Wunderschöne Stempel und ein wirklich tolles Designerpapier, das ganz in Schwarz/Weiß gehalten ist. Eignet sich also prima zum ausmalen. Was ich auch gleich gemacht habe :))
After first looking through the catalogue (back in November!) I instantly fell in love with the Petal Passion Suite on pages 22 and 23. Absolutely beatiful stamps, DSP ( all in black and white) and accessories. The DSP is perfect to colour in, which I did for my project.

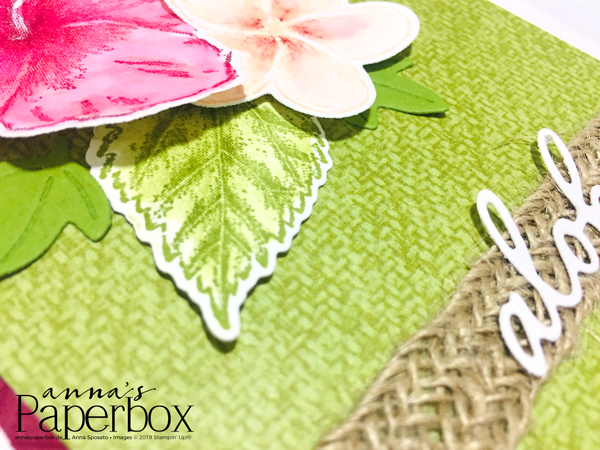
Beim ausmalen habe ich mir zuerst das Designerpapier zurecht geschnitten und anschließend mit verschieden Stiften und Markern ausgemalt. Auf den Bilder seht ihr einmal eine Version mit Aquarellstiften und eine mit Stampin‘ Blends Markern. Die Karte auf dem ersten der beiden unteren Bilder habe ich mit den Aquarellstiften ausgemalt und dann die Farbe mit den Aqua Paintern verwischt.
I first cut one sheet of DSP to the size needed for my card and then coloured them. For one card I used the watercolour pencils and for the second one the Stampin‘ Blends. On the first picture below you see the version with the pencils. After coloring it, I used the Aqua Painters to blur the color a bit.

Für die Karte auf dem zweiten Bild (unten) habe ich die Stampin‘ Blends Marker verwendet.
On the second card I used the Blends. Both shades of each color.

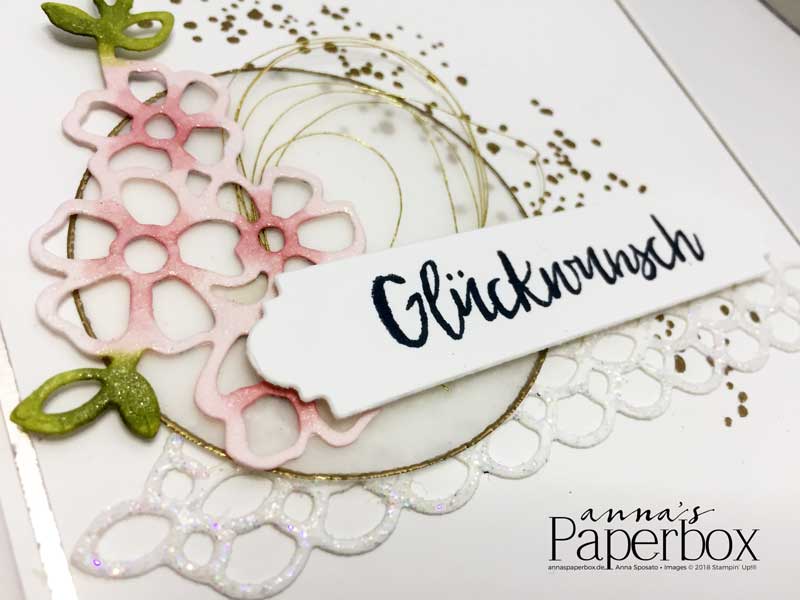
Zu dieser Reihe gibt es auch Thinlits. Zwei davon seht ihr auf den Karten. Das Ornament auf der Glückwunschkarte ist mit Dimensionals (Abstandshalter) auf den weißen Farbkarton aufgeklebt. Diesen habe ich auf die Breite der Karte geschnitten und dann die Ecken mit der Kleinen 1,3 cm (0,5″) Kreisstanze ausgestanzt. Bei dem Ornament auf der Dankeskarte wollte ich mal wieder die Inlay-Technik verwenden. Hat zwar ein klein wenig mehr Zeit in Anspruch genommen, aber das Endergebnis ist die Mühe immer wieder wert 🙂 . Hier empfehle ich auch unbedingt die Blätter mit Mehrzweckaufklebern. Bei diesen Mikroteilchen einfach unerlässlich.
The suite wouldn’t be complete without Punches or Thinlits/Framelits and for this suite we got Thinlits. The embellishment on the Best Wishes card (Glückwunsch) is a bis easier to make. I just attached it with Dimensionals to a piece of white cardstock, which I first trimmed to the width of the card and punch out the corners with the 0,5″ (1,3 cm) circle punch. For the Thank You card (Danke) I wanted to use the inlay-technique. With all those tiny bits and pieces it feeled like forever to finish it, but the end result is always worth it. I also recomend to use the Multipurpose Adhesive Sheets for this technique. That way you avoid the hassle of putting teeny tiny dots of glue onto these really small bits of cardstock.

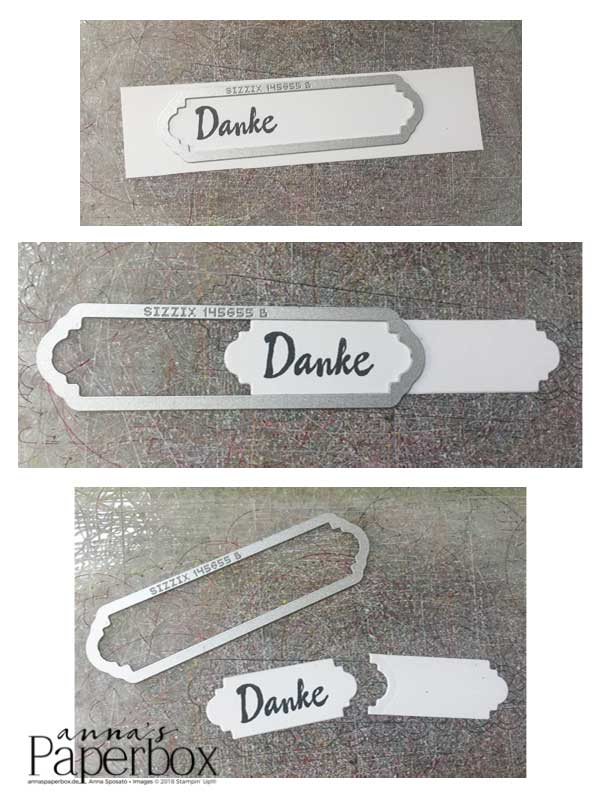
Das Etikett der Glückwunschkarte ist die Originalgröße. Für die Dankeskarte fand ich das Etikett ein bisschen zu groß, also habe ich es mit der Form gekürzt. Die kleinen Zierelemente (Blüte und Blatt) habe ich auf ein Stück Silber Metallic Garn aufgefädelt und an das Ornament geknotet.
On the picture below you see how I shortened the tag for the Thank You label. The Best Wisches label is the original size. I also threaded two embellishments (flower and leaf) onto some silver metallic tread and knotted it onto the cut out lattice decoration.
Danke dass ihr heute vorbei geschaut habt. Weiter geht es mit dem Blog Hop unten. Nutzt die Links um euch all die anderen tollen Projekte anzuschauen. Viel Spaß beim weiterhoppen. Bis bald 🙂
Thanks for stopping by. Hope you are having fun hopping around and continue on. Happy hopping and CU next time 🙂


Materialien/Product List



inkybutterfly
Beautiful Anna x
Jaimie K
Wunderschön gemacht!
Sue Harris
Beautiful cards Anna – you’ve smashed it again! xx
lifecatsotherthings
Very striking indeed
Justyna (Perfect Crafts)
Beautiful xx
Linda Worth
Lovely card x
Karen Kilner
I love the paper, will be trying myself soon
Tina
Wow, das sind tolle Farben und die Schattierungen sind fantstisch!
Angelina (Intatwyne Designs)
Lovely card and great choice of colours.
Karen Taylor
What a stunning card!
Vicky Thompson
Stunning x
Laurie Jennings
Super card Anna x
Katrina King
beautiful vibrant colours x
Jillian Selwood
Great cards Anna and amazing colouring xx
PaperCraft Skies
Gorgeous card x
arieswomandi
The cards are both really stunningxx
jillchapman
Wow! Great colours and lovely cards 🙂
Sally Shaw
Stunning cards Anna, beautiful.xx